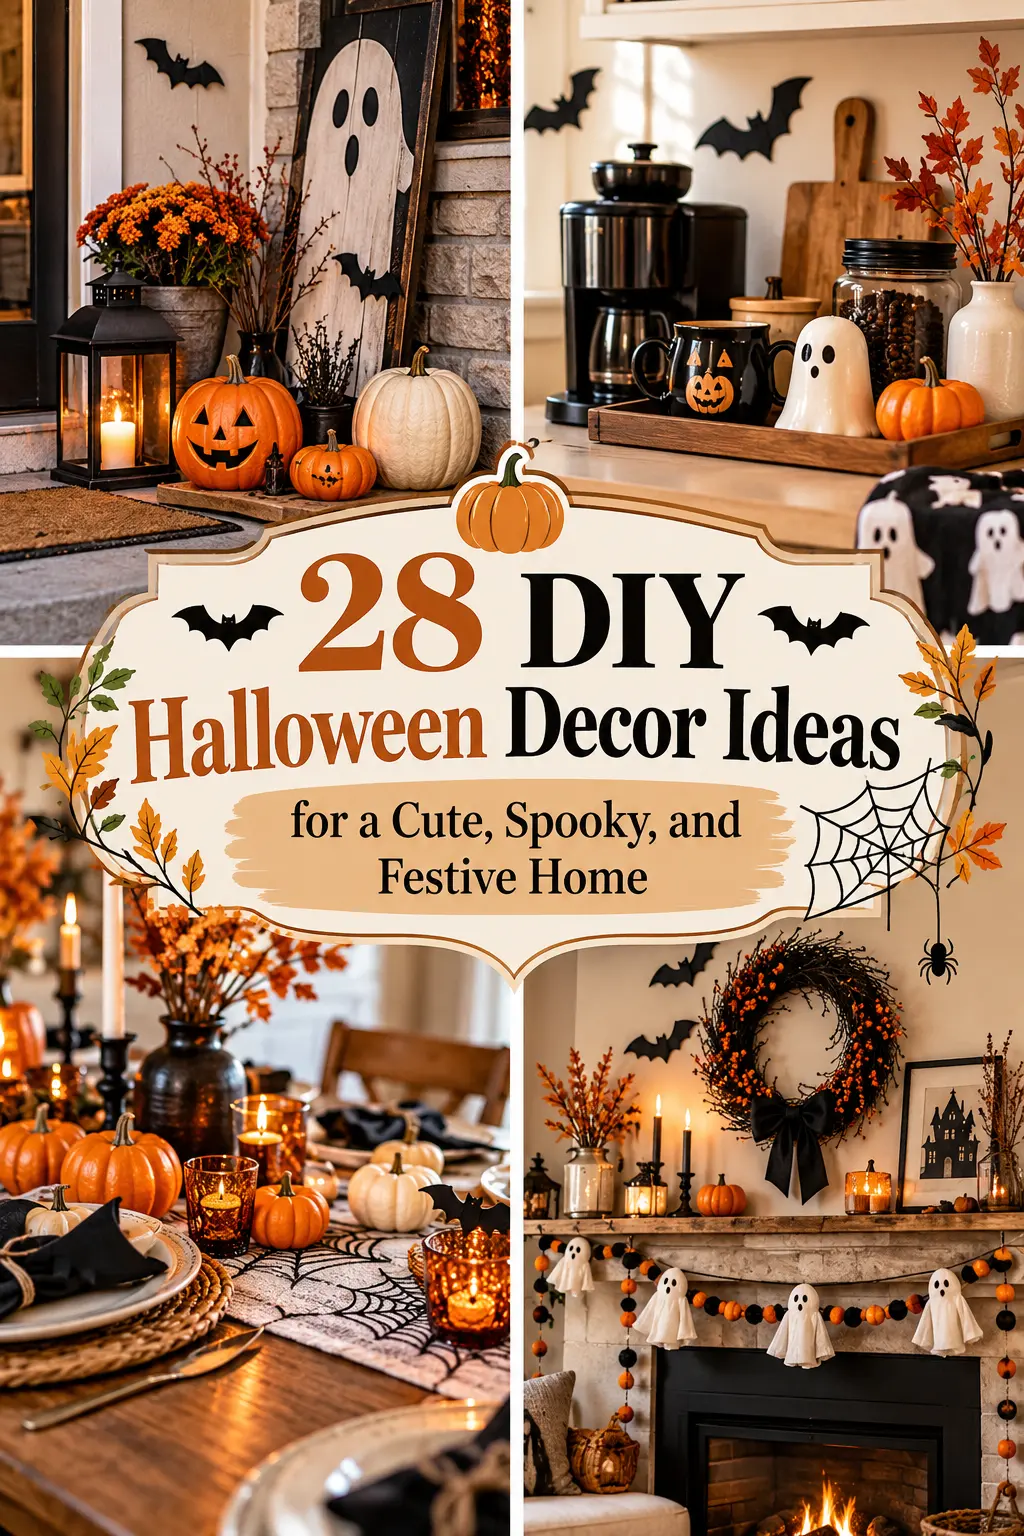
28 DIY Halloween Decor Ideas for a Cute, Spooky, and Festive Home
Halloween decorating doesn’t have to mean filling every corner with frightening skeletons and oversized spiderwebs. With a few simple craft supplies, thrifted finds, and seasonal accents, you can create a home that feels festive, a little spooky, and genuinely welcoming. The best DIY Halloween decor ideas balance playful details with the style of your existing space, whether you prefer a cute cottage-inspired look, a classic orange-and-black theme, or something darker and more dramatic.
From handmade ghosts and painted pumpkins to creative porch displays and charming tabletop decorations, these projects offer plenty of ways to personalize your home without completely redecorating. Many use everyday materials such as mason jars, paper, fabric scraps, branches, and inexpensive craft supplies. You can adapt the colors and finishes to suit your budget, available space, and decorating preferences.
1. Make Cute Cheesecloth Ghosts
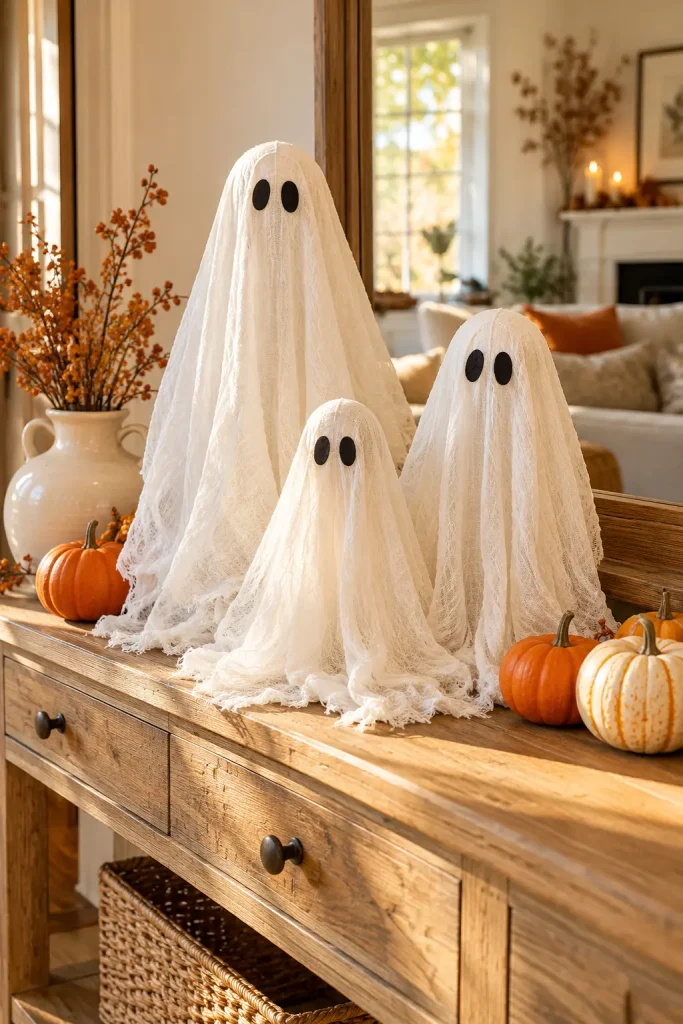
Cheesecloth ghosts add a playful Halloween touch without making a room feel too frightening. Their loose, airy shape looks especially charming on a mantel, bookshelf, entryway console, or dining table.
To create them, drape white cheesecloth over a lightweight form, such as a small ball supported by a bottle or cup. Shape the fabric into a flowing silhouette, then let it dry if you’re using a fabric stiffener. Once the form holds its shape, remove the support and add simple black eyes using felt or paper.
Materials to gather:
- White cheesecloth
- Lightweight shaping forms
- Fabric stiffener, if desired
- Black felt or paper
- Craft adhesive
Arrange two or three ghosts at different heights for a small display. Keep the expressions simple for a cute look, or use uneven eyes for a slightly mischievous personality. If the ghosts will be near children or pets, secure small decorative pieces carefully.
2. Paint Pumpkins in Cute Halloween Colors
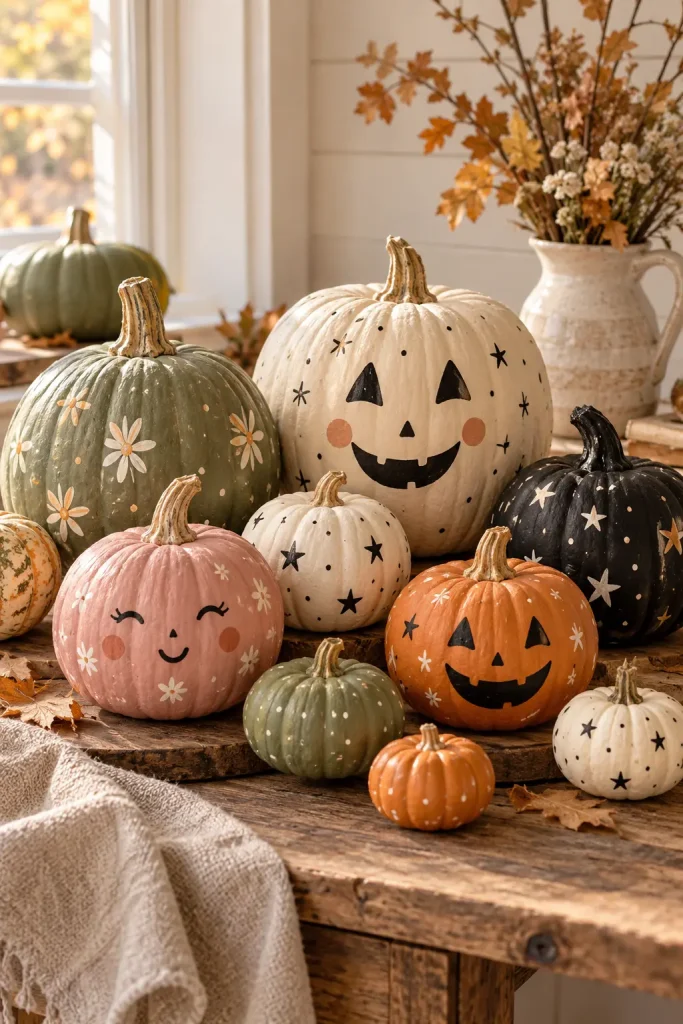
Painted pumpkins are an easy way to coordinate Halloween decorations with your home’s existing color palette. Instead of relying only on bright orange, experiment with cream, muted sage, dusty pink, charcoal, or warm terracotta.
Start with clean, dry pumpkins or craft pumpkins. Apply a suitable paint for the surface, allow it to dry according to the product instructions, and add simple faces, dots, stars, or tiny bats. A group of differently colored pumpkins often looks more interesting than several identical ones.
For a softer look, combine two plain pumpkins with one featuring a playful face. For a more traditional Halloween arrangement, use black-and-orange combinations with small white details.
Quick Tip: Test your paint on an inconspicuous area first, especially when working with faux pumpkins or glossy finishes.
3. Create a Black Bat Wall Display
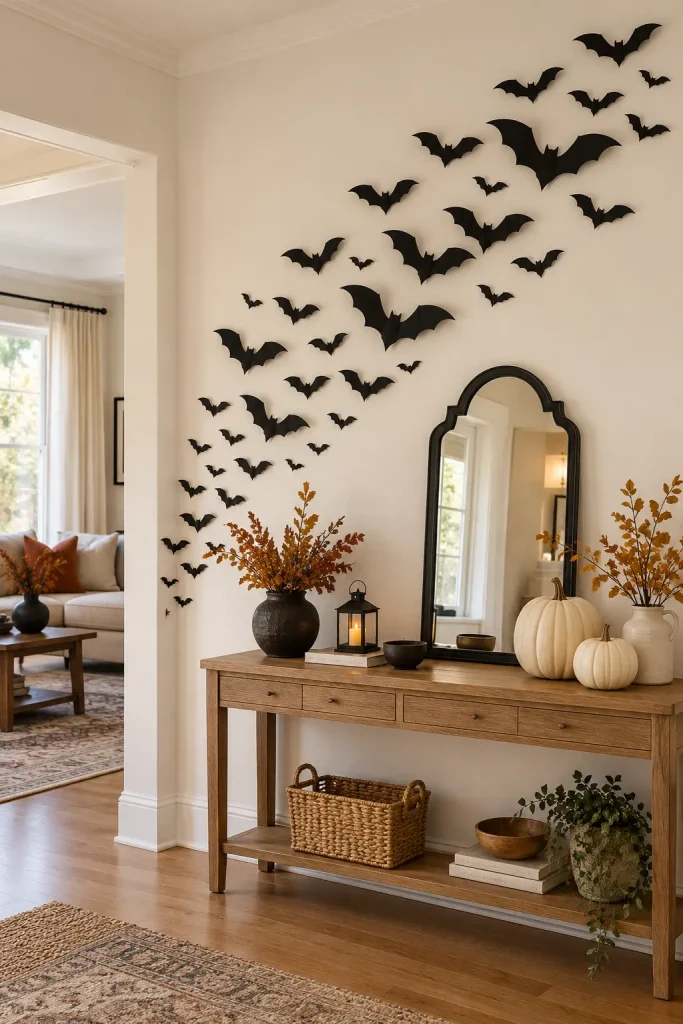
A wall of flying bats creates an instant Halloween focal point with very little expense. Black paper silhouettes look striking against white, beige, pale gray, or softly colored walls.
Cut bat shapes from lightweight black cardstock, varying their sizes to make the arrangement feel more natural. Fold the wings slightly along the center to give the shapes dimension, then attach them with removable wall-safe adhesive appropriate for your paint finish.
Begin with a loose cluster near one corner and gradually spread the bats outward, as if they’re taking flight. You can direct the arrangement toward a doorway, mirror, staircase, or mantel.
Do: Try the layout on the floor before attaching anything to the wall.
Don’t: Arrange every bat in a perfectly straight line; a sweeping curve creates more movement.
4. Design a Spooky Halloween Wreath
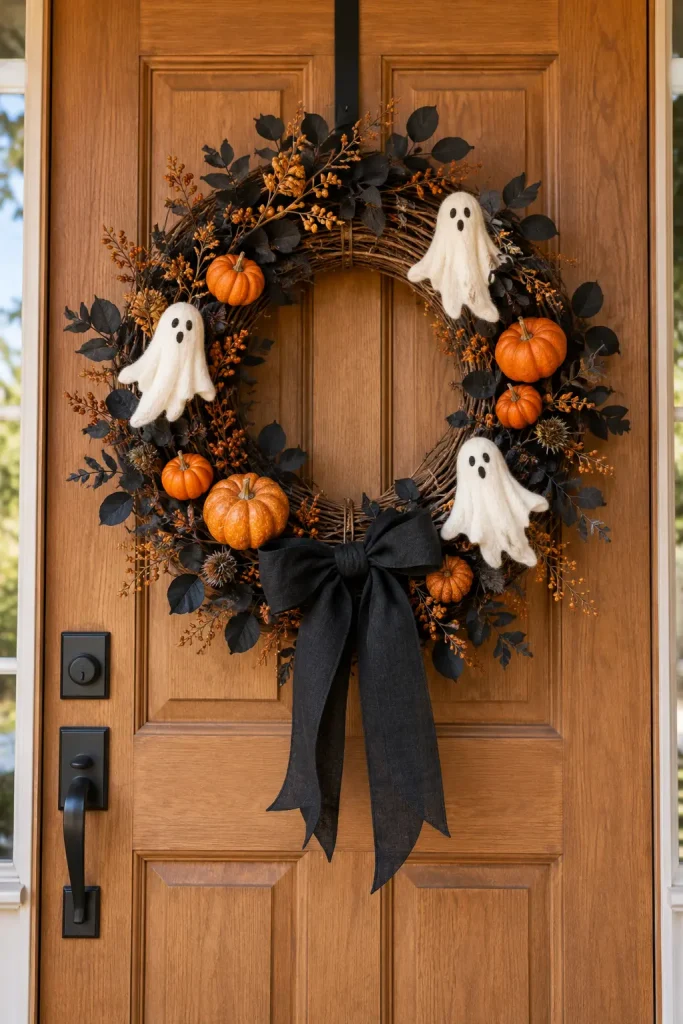
A handmade wreath makes a festive first impression before guests even enter your home. For Halloween, start with a grapevine or wire wreath base and build a design around your preferred theme.
For a dark, dramatic version, use black-painted branches, deep plum foliage, and a wide black ribbon. If you prefer a friendlier style, incorporate miniature orange pumpkins, cream felt ghosts, and a simple gingham bow.
Attach decorations securely with floral wire or suitable craft adhesive. Leave some of the base visible so the wreath retains its shape instead of becoming overly crowded.
The same base can be reused next year with different ribbons and seasonal embellishments, making this a practical project for anyone who enjoys changing decorations each fall.
5. Turn Mason Jars Into Halloween Lanterns
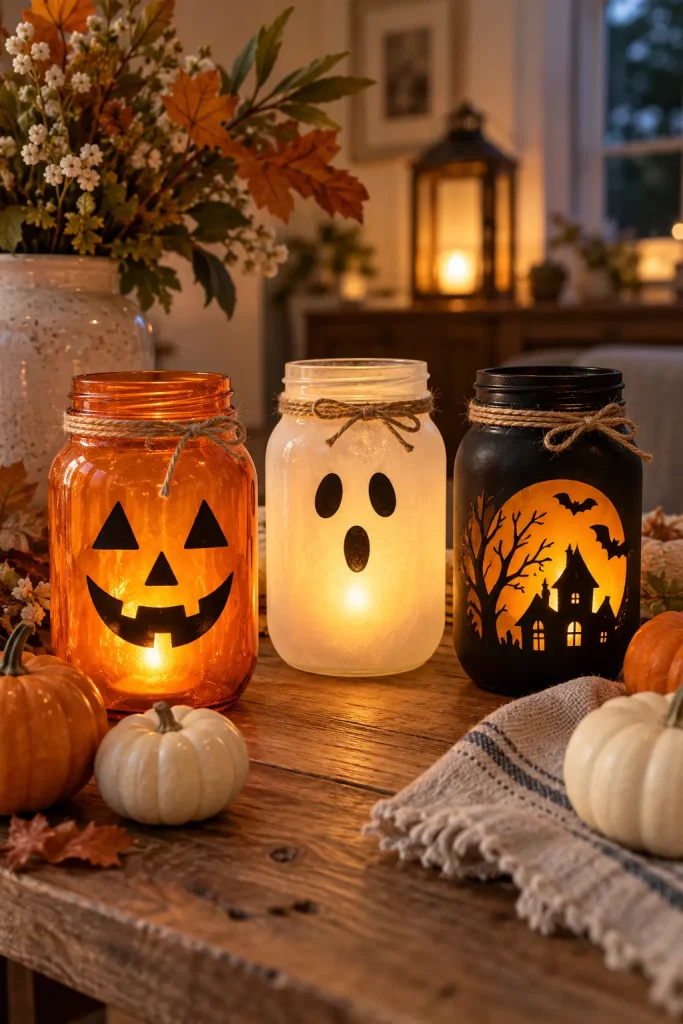
Empty mason jars can become charming Halloween lanterns for shelves, dining tables, and covered porches. Their glass surfaces work well with translucent orange paint, frosted white finishes, or black silhouettes.
For a jack-o’-lantern design, paint the outside of a clean jar orange and add a simple black face after the paint dries. For a ghost version, use a frosted white finish and two black eyes. Place a battery-operated tea light inside to create a gentle glow.
Try making three jars with different expressions rather than repeating the same design. A little variation gives the display a handmade feel.
Safety note: Use battery-operated lights instead of open flames, especially in painted jars or near paper, fabric, and dried foliage.
6. Craft a Friendly Halloween Door Hanger
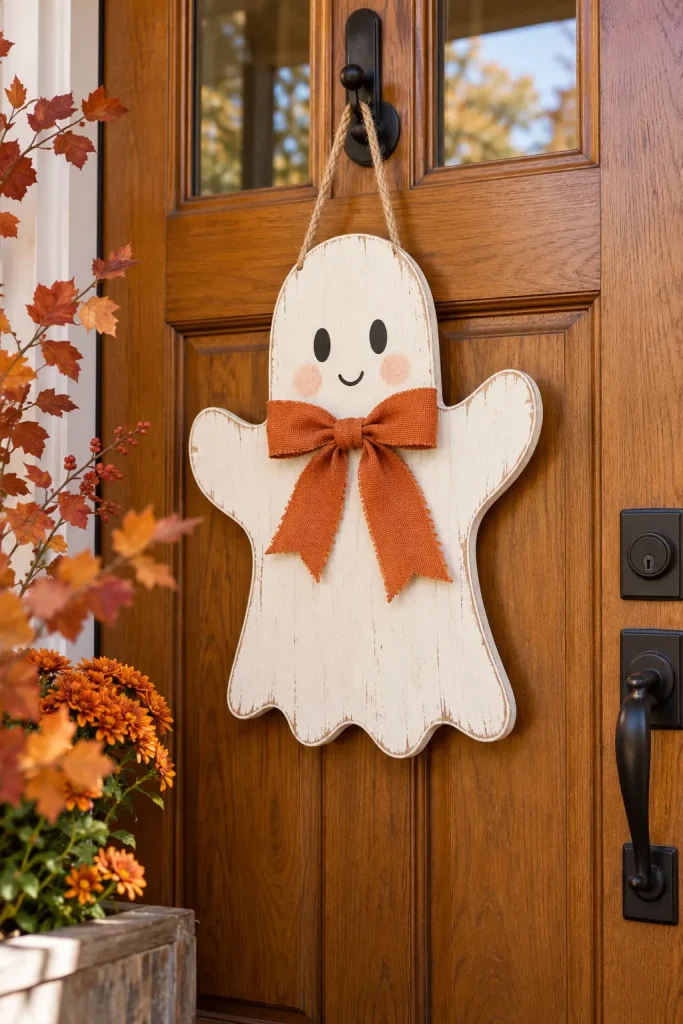
A handmade door hanger is an easy way to personalize your entry without committing to a full wreath. Choose a ghost, pumpkin, black cat, or crescent moon as the main shape.
Cut the silhouette from lightweight craft wood or use a ready-made unfinished wooden shape. Paint it in two or three coordinated colors, add simple facial details, and finish with a ribbon loop for hanging.
For a farmhouse-inspired look, pair an ivory ghost with a small black bow and muted orange accents. A more colorful design can feature lilac, pink, or sage green.
Keep the hanger light enough for the door or hook where it will be displayed. If it will hang outdoors, use materials and finishes suitable for the expected weather.
7. Make Mini Halloween Potion Bottles
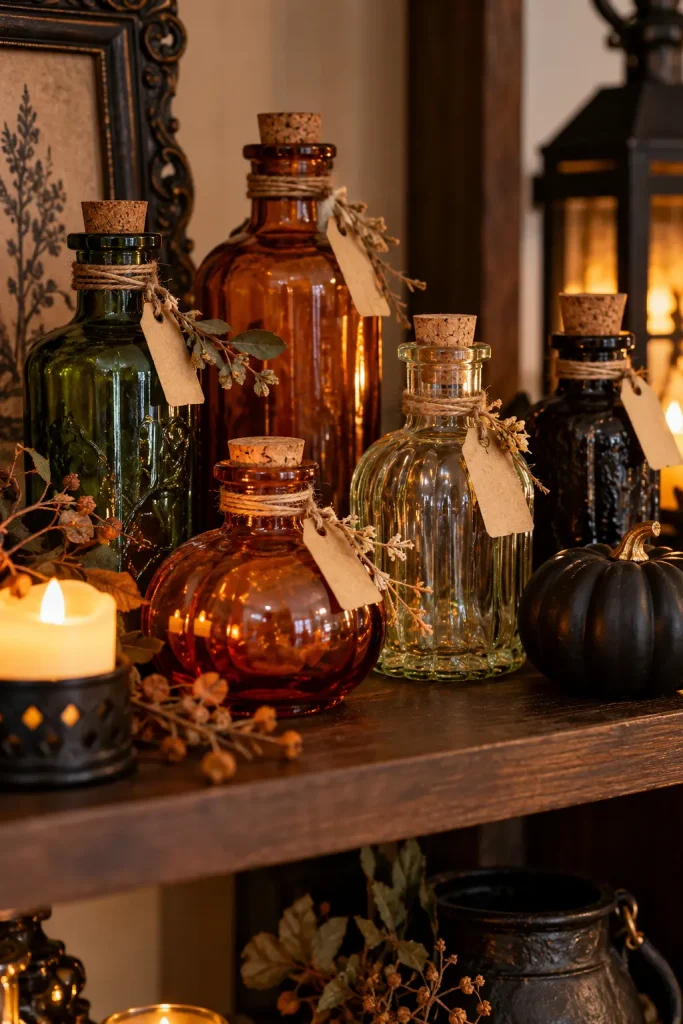
Potion bottles bring a little storybook magic to a Halloween display. Gather small glass bottles from thrift stores or reuse clean bottles with interesting shapes. Amber, green, clear, and dark glass create a collected, vintage-inspired appearance.
Add cork or screw-top closures, narrow ribbon, twine, and small paper tags. Fill the bottles with harmless decorative materials such as colored water in securely sealed containers, paper confetti, or dried craft foliage.
Arrange them on a dark tray with a few battery-operated candles and small pumpkins. Vary the bottle heights so the display has dimension.
Quick Tip: Keep decorative bottles clearly separate from food, beverages, and everyday medicine containers, particularly in homes with children.
8. Decorate the Fireplace Mantel With Paper Ghosts
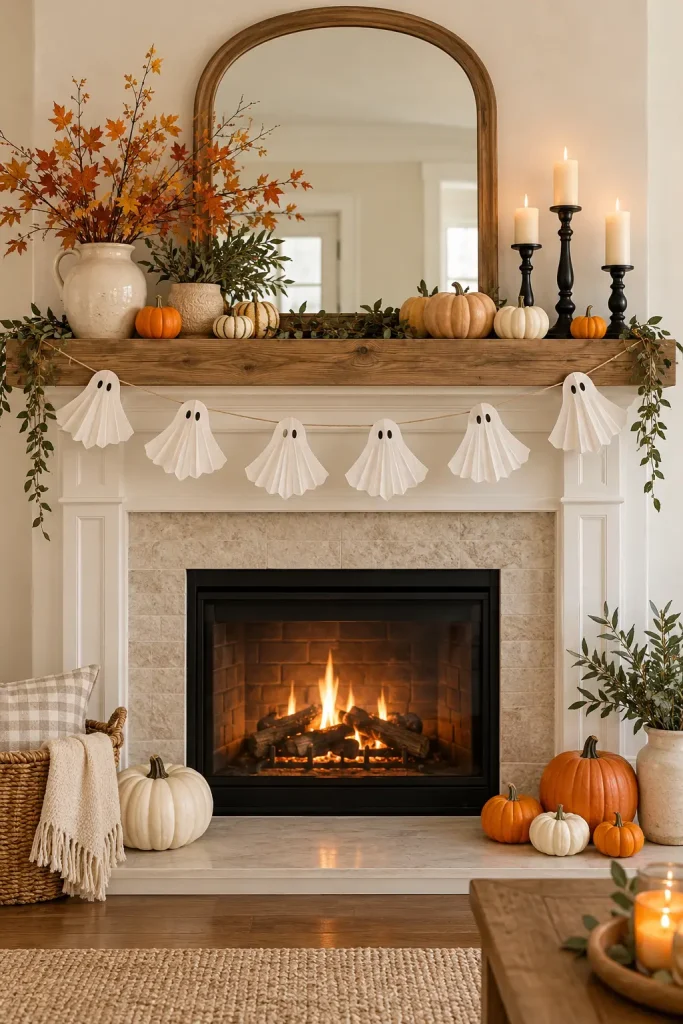
If you want seasonal decorating that doesn’t overwhelm your living room, start with the fireplace mantel. A paper ghost garland adds movement and personality without requiring large or expensive decorations.
Cut ghost shapes from sturdy white paper or lightweight cardstock. Give each ghost a different expression, then connect them with string or ribbon. Drape the garland loosely across the mantel and balance it with small pumpkins, framed seasonal artwork, or a few dark candleholders.
A neutral fireplace can support an orange-and-black palette, while a traditional brick fireplace looks especially welcoming with cream paper, warm wood, and muted orange accents.
Keep the garland well away from flames and hot surfaces if the fireplace is in use.
9. Create a Halloween Candy Display
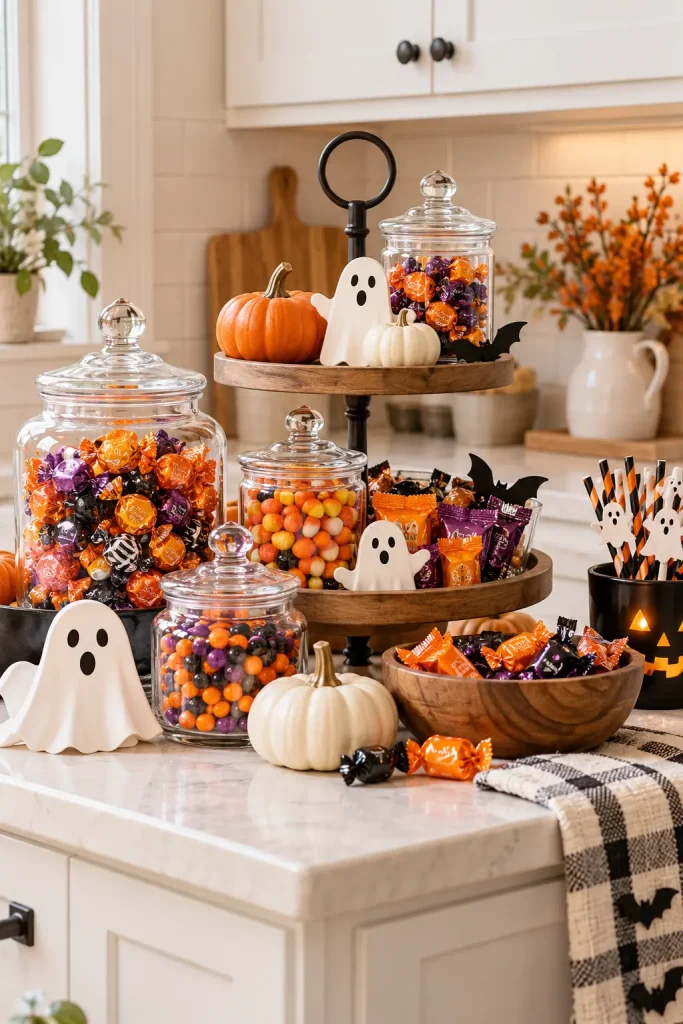
A Halloween candy station can be both practical and decorative. Set up a small area on a kitchen counter, entryway table, or sideboard where treats are easy to reach and the rest of the room stays uncluttered.
Use clear jars, small bowls, or a tiered wooden tray to create different heights. Add black-and-orange ribbons, miniature pumpkins, and a few paper bats to establish the theme.
For a cute display, choose pastel candy colors and smiling ghost accents. For a classic look, stick with orange, black, purple, and white.
Keep candy in food-safe containers, and place it away from direct sunlight or heat that could affect its quality.
10. Make a Black Cat Silhouette for the Window
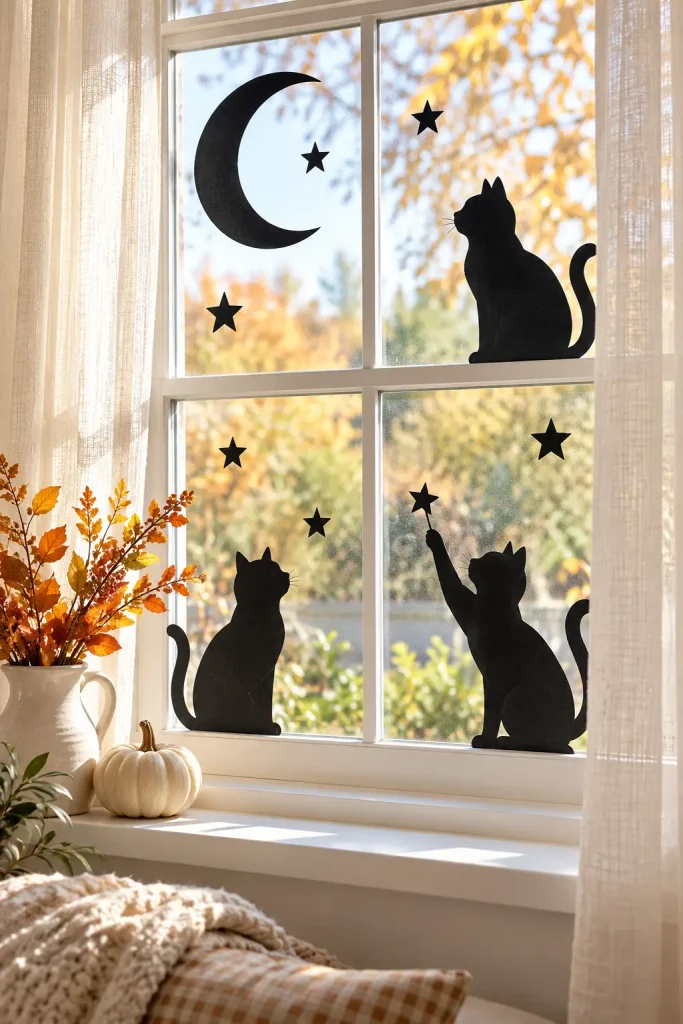
Black cat silhouettes are a classic Halloween craft that works especially well in windows. Their clean shapes create a spooky effect without requiring elaborate decorations.
Cut one or more cat silhouettes from black cardstock. You can choose a sitting cat with pointed ears, an arched-back cat, or a stretched-out silhouette with a curling tail. Attach the shapes to the glass with removable, window-safe materials.
During the day, natural light makes the shapes easy to see from inside. In the evening, interior lighting can make them stand out from outdoors, depending on the window’s position and surroundings.
For a coordinated display, add small paper stars or a crescent moon without overcrowding the glass.
11. Turn Tin Cans Into Halloween Pencil Holders
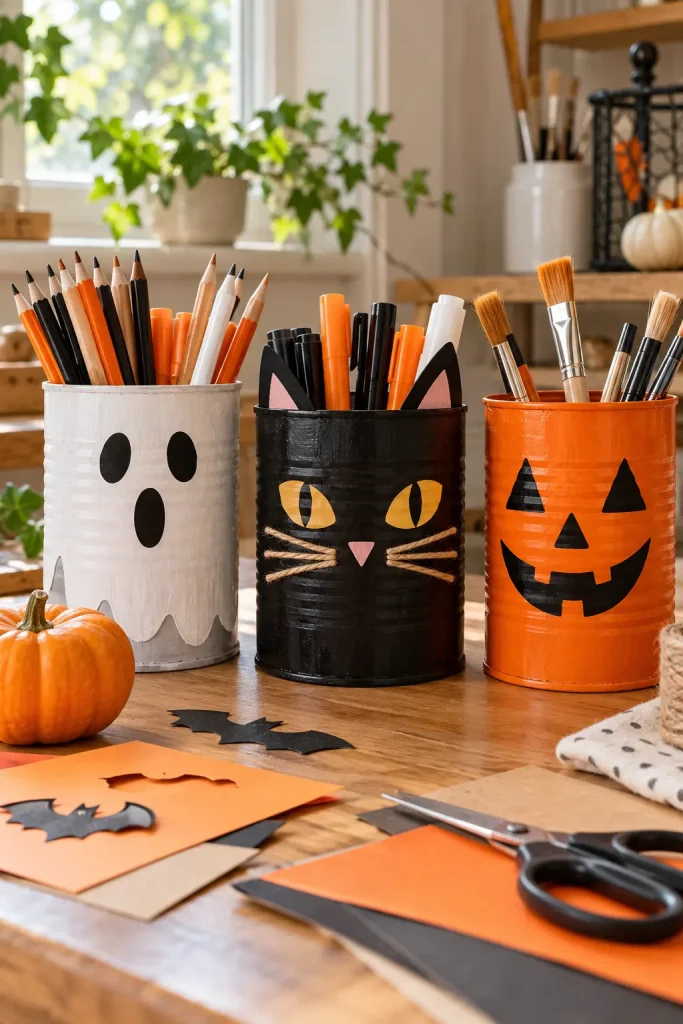
Halloween crafts can also serve a useful purpose. Clean, empty tin cans can become pencil holders, paintbrush containers, or organizers for craft supplies.
Remove the labels, wash the cans thoroughly, and make sure no sharp edges remain. Cover the exterior with suitable paint or paper, then add a ghost face, a black cat silhouette, or a pumpkin design.
These holders work nicely on a child’s craft table, a home office desk, or a seasonal activity station. Use wider cans for paintbrushes and shorter ones for crayons or markers.
Choose a stable base and avoid leaving exposed sharp metal edges. If working with children, an adult should prepare the cans before decorating begins.
12. Build a Miniature Haunted House
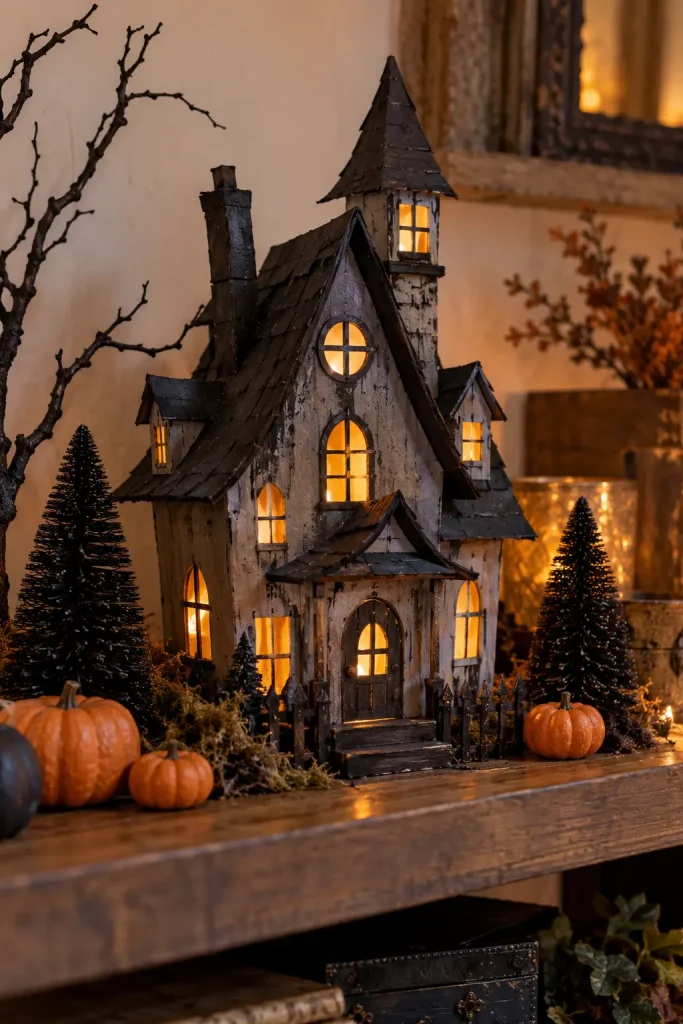
A miniature haunted house makes a charming centerpiece for a shelf or side table. You can create one from cardboard, a small unfinished wooden house, or a simple paper craft template.
Paint the walls charcoal, deep brown, or faded gray. Add crooked-looking paper windows, a dark roof, and tiny cutout bats. A little dry-brushed paint can give the exterior an aged appearance without requiring complicated techniques.
For a more elaborate scene, arrange two or three houses at different heights with paper trees and miniature pumpkins. Battery-operated lights placed safely inside can create a warm glow through the windows.
The strongest displays usually have one main house and just a few supporting pieces.
13. Make a Spiderweb Table Runner
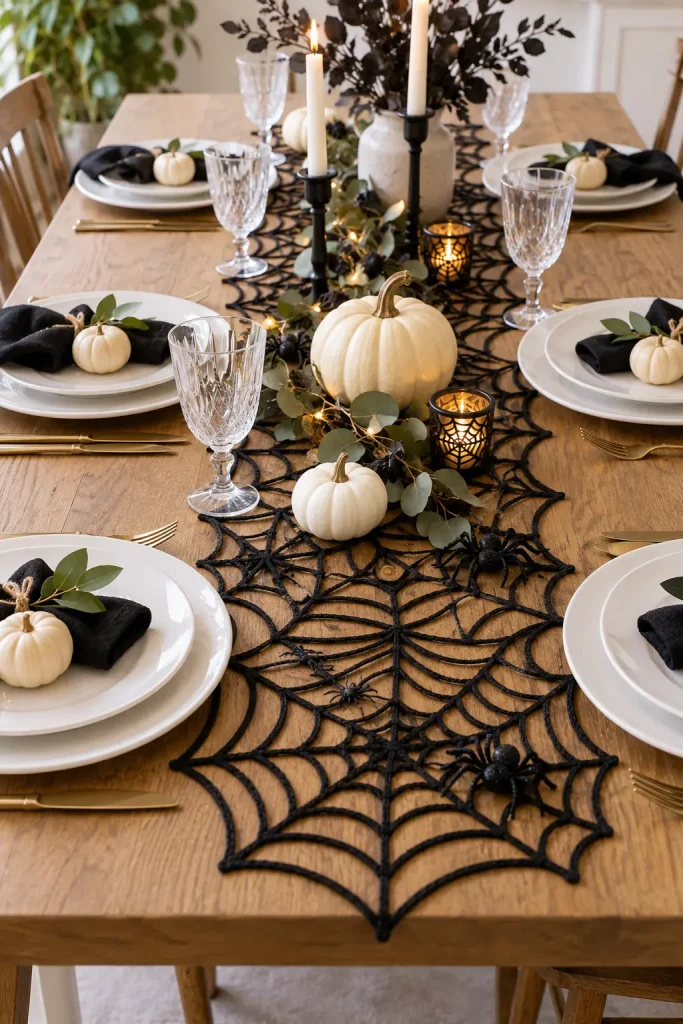
A spiderweb table runner adds a Halloween theme to the dining room without changing your everyday tableware. Use black felt, a suitable fabric, or a piece of inexpensive cloth as the base.
Draw a web pattern lightly before cutting or painting it. If you prefer a less graphic style, create a simple web motif at each end rather than covering the entire runner.
Pair it with white plates, small black napkins, and miniature pumpkins. Natural wood helps balance the dark pattern, while glass candleholders add a little shine.
For family meals, make sure the runner lies flat and doesn’t hang into walking paths or near open flames.
14. Arrange a Cute Halloween Tiered Tray
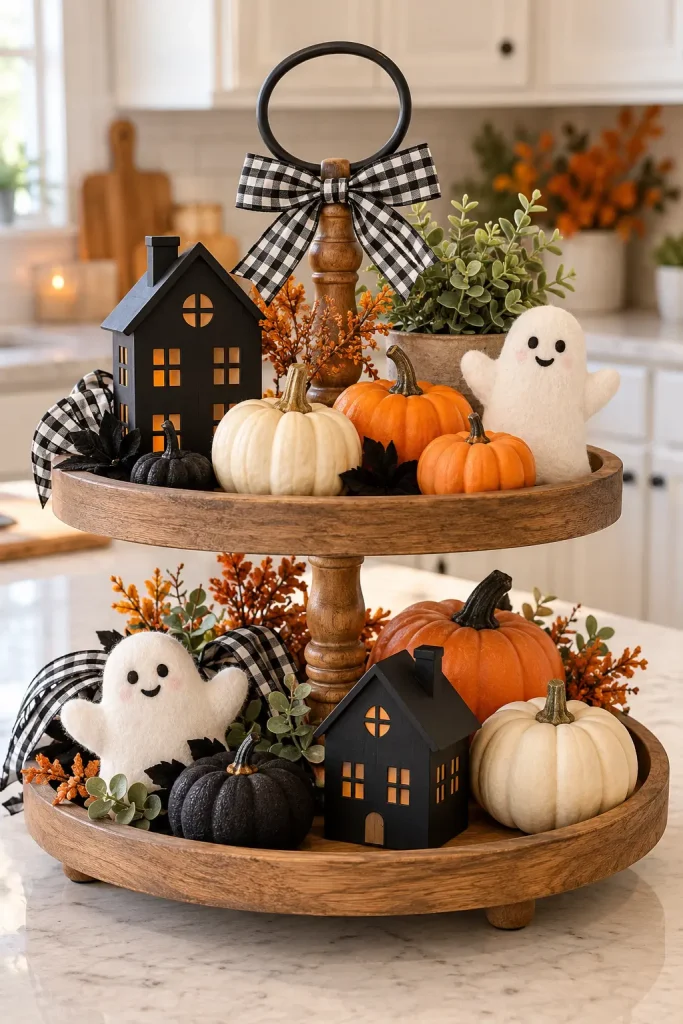
A tiered tray gives small Halloween decorations a designated home, which is especially helpful in a compact kitchen or apartment. The trick is to mix different shapes rather than filling every available space.
Use a combination of miniature pumpkins, felt ghosts, small ceramic houses, black bats, and short jars. Add one or two ribbon details to connect the pieces visually.
A useful arrangement includes:
- One larger decorative item on the bottom tier
- Two or three small accents on the upper tier
- A few open spaces to keep the display from looking crowded
Choose a consistent palette, such as orange, cream, and black, or try sage green and ivory for a softer interpretation.
15. Make Hanging Ghost Decorations for the Porch
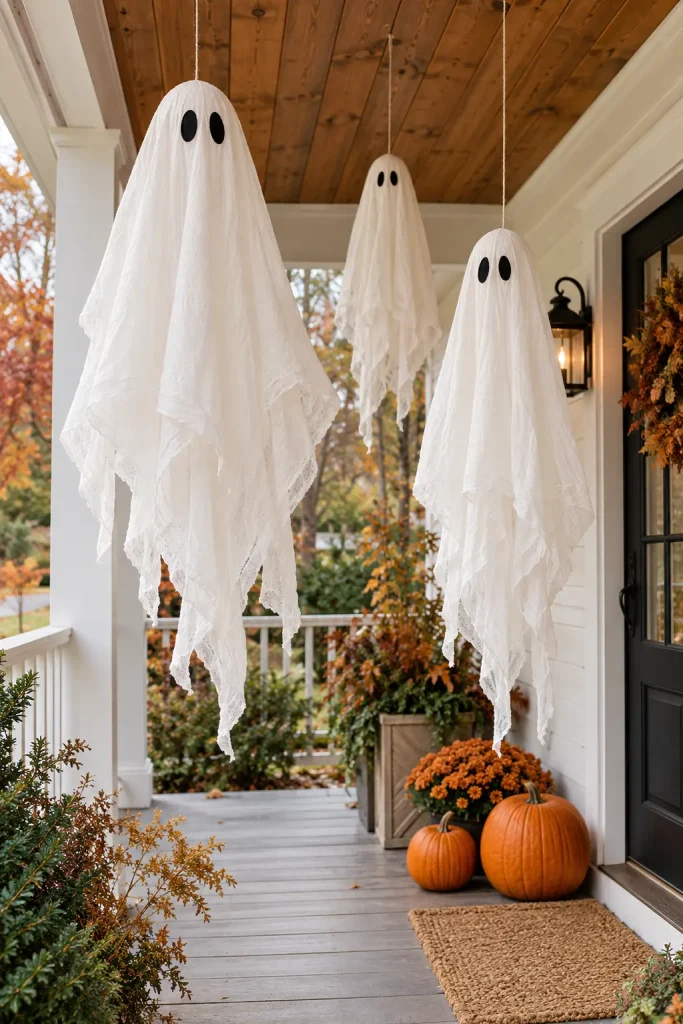
Hanging ghosts bring movement to a Halloween porch or covered outdoor seating area. Lightweight fabric, old white sheets, or cheesecloth can be shaped into simple ghost figures with minimal sewing.
Create a rounded head using a lightweight form and drape fabric over it. Add securely attached eyes, then suspend each ghost with clear line or sturdy string from a suitable support.
Vary the lengths so the figures hang at different heights. A few ghosts look more intentional than a large mass of fabric that hides the doorway.
Choose weather-appropriate materials and bring the decorations indoors during strong wind or rain. Keep hanging pieces away from paths where people could walk into them.
16. Design a Halloween Bookshelf
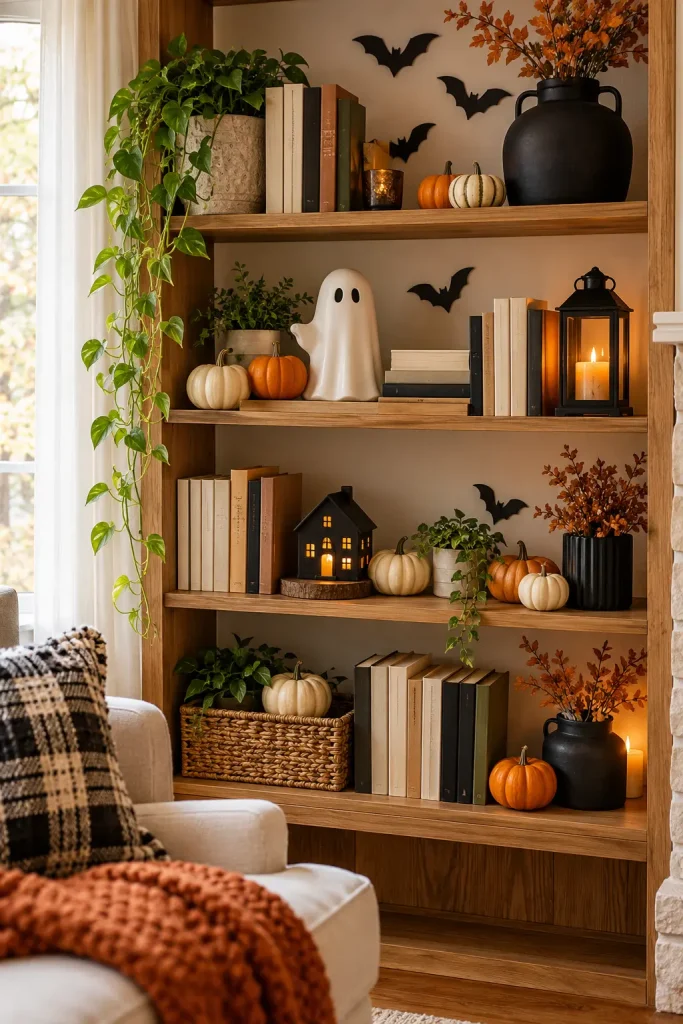
You don’t need a separate Halloween display table when your bookshelf can do the job. A few well-chosen seasonal objects can make an ordinary bookcase feel festive while leaving room for everyday belongings.
Group books by color or turn a few covers outward if they have suitable Halloween artwork. Add miniature pumpkins, a small ghost, a dark ceramic vase, and a few paper bats attached to the wall behind the shelves.
Vary the height of the objects so the display doesn’t become a flat row. Leave some books accessible, especially if the shelves are used every day.
For a restrained look, use mostly neutral books and introduce orange or black through two or three decorative accents.
17. Create a Halloween Centerpiece With Branches
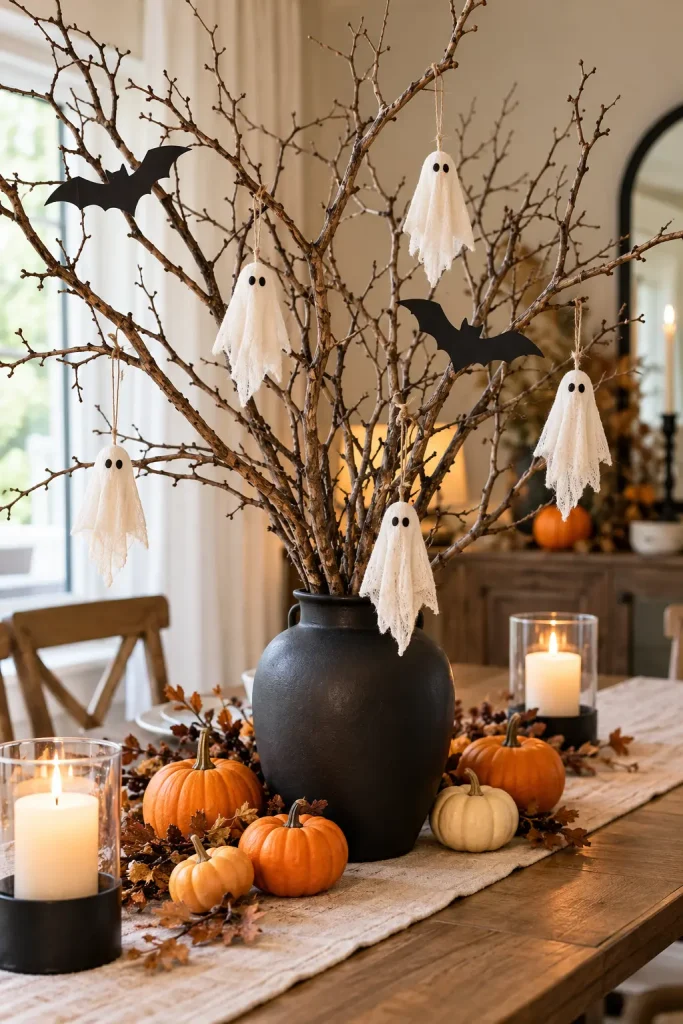
For a taller Halloween decoration, use branches arranged in a sturdy vase. Their angular shapes create a spooky silhouette without taking up much tabletop space.
Choose clean, dry branches that fit comfortably inside the container. Add small paper bats, lightweight felt ghosts, or a few orange ribbon pieces. Keep the embellishments sparse so the natural branch shapes remain visible.
A matte-black vase creates a dramatic effect, while a cream ceramic vessel offers a softer contrast. Arrange miniature pumpkins around the base to connect the centerpiece to the rest of your seasonal decor.
18. Decorate the Stairs With Paper Bats and Pumpkins
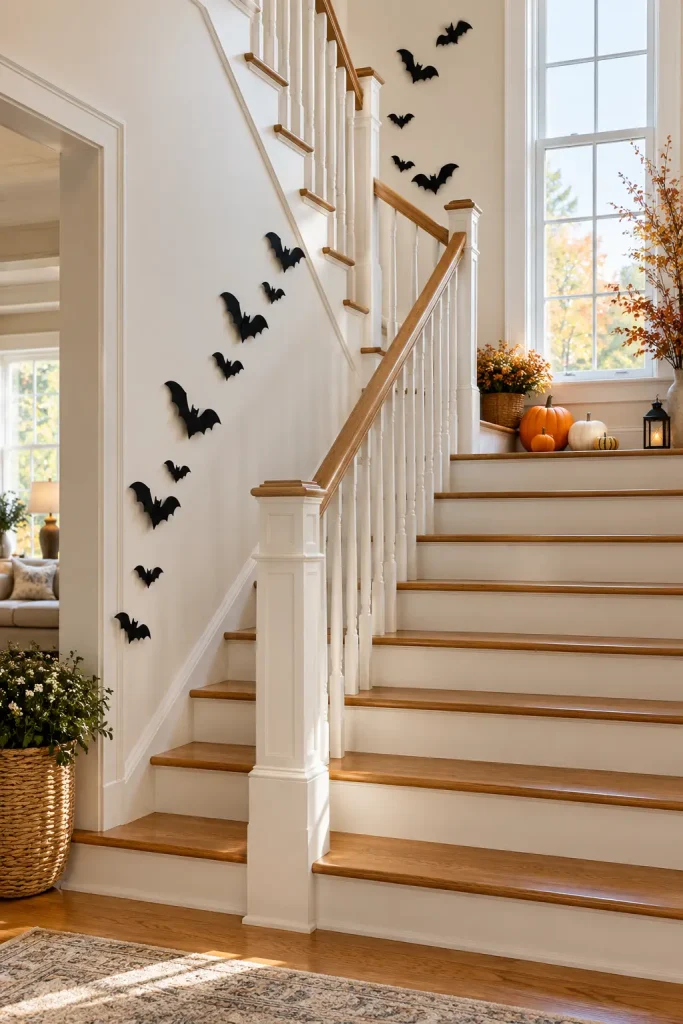
A staircase offers a natural path for Halloween decorations. Instead of covering every step, use a simple pattern that guides the eye upward.
Attach black paper bats to the wall beside the stairs in a loose, climbing arrangement. Place a few small pumpkins on wider landings or stable decorative surfaces, keeping the walking area clear.
If you have a white staircase, black silhouettes provide contrast. Natural wood stairs work well with cream pumpkins and muted orange accents.
Use removable wall-safe attachments and avoid loose garlands or objects that could snag clothing or become tripping hazards. Stair treads should remain clear for everyday use.
19. Make No-Carve Pumpkin Characters
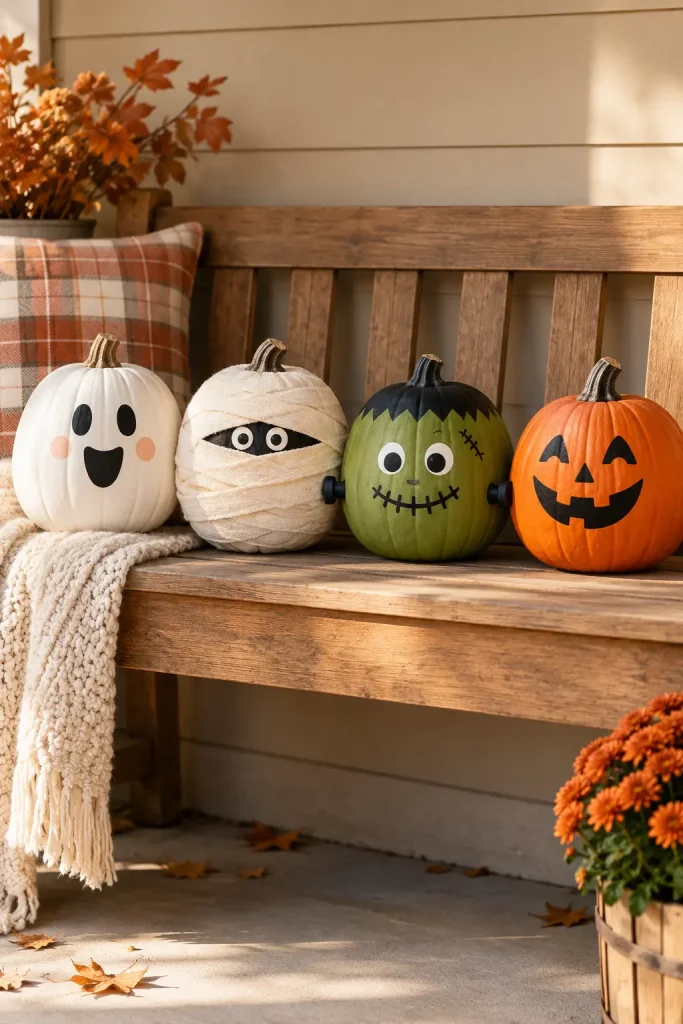
No-carve pumpkin characters are a fun option for households that want Halloween decorations without knives or complicated carving. Paint the pumpkins to resemble ghosts, mummies, monsters, or friendly vampires.
For a mummy, paint the pumpkin white and add narrow gray or cream bandage-like stripes. Leave a small gap for two eyes. For a ghost, use white paint and a simple dark expression. A green monster can have painted eyebrows, an expressive mouth, and small felt details.
Use surface-appropriate paint and adhesives, and let each layer dry before adding another. If you are decorating real pumpkins, remember that heavy paint or glued embellishments can make them unsuitable for later composting, depending on the materials used.
20. Make a Halloween Shadow Box
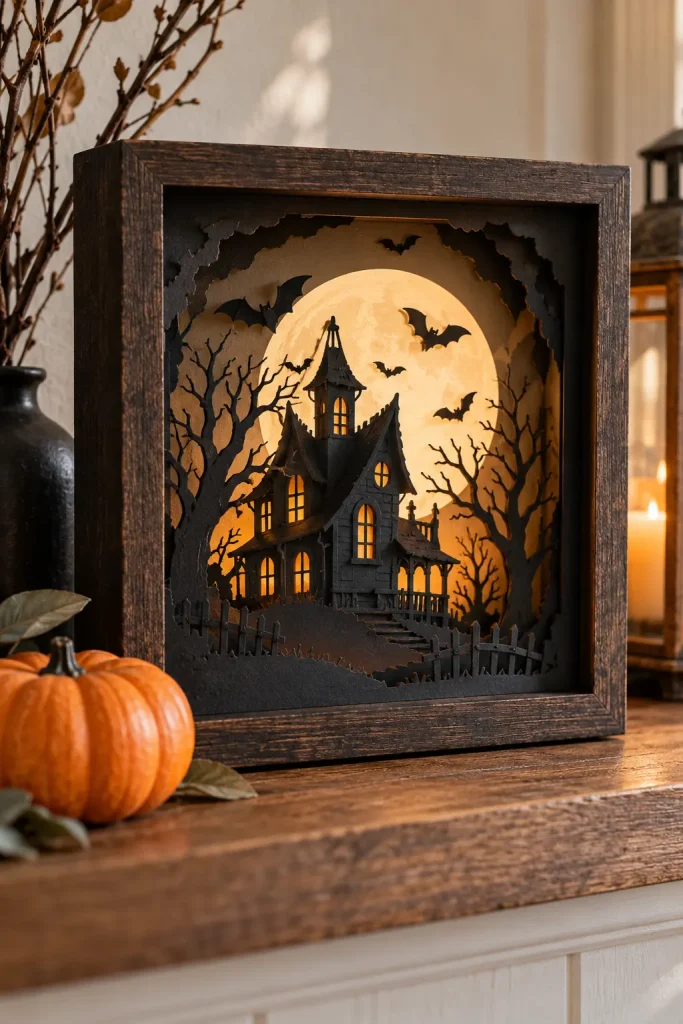
A Halloween shadow box creates a layered scene that looks more detailed than a flat wall decoration. Use a deep frame, a small wooden display box, or a sturdy craft frame.
Cut several layers of cardstock into a moon, bats, a crooked house, and distant trees. Arrange them at slightly different depths using small spacers to create a sense of distance. A dark background helps the lighter shapes stand out.
Choose a simple palette of black, ivory, and muted orange. The layered effect does most of the decorative work, so extra embellishments aren’t necessary.
Display the finished shadow box on a bookshelf or hang it in an entryway where the layers can be seen clearly.
21. Craft a Halloween Garland From Felt
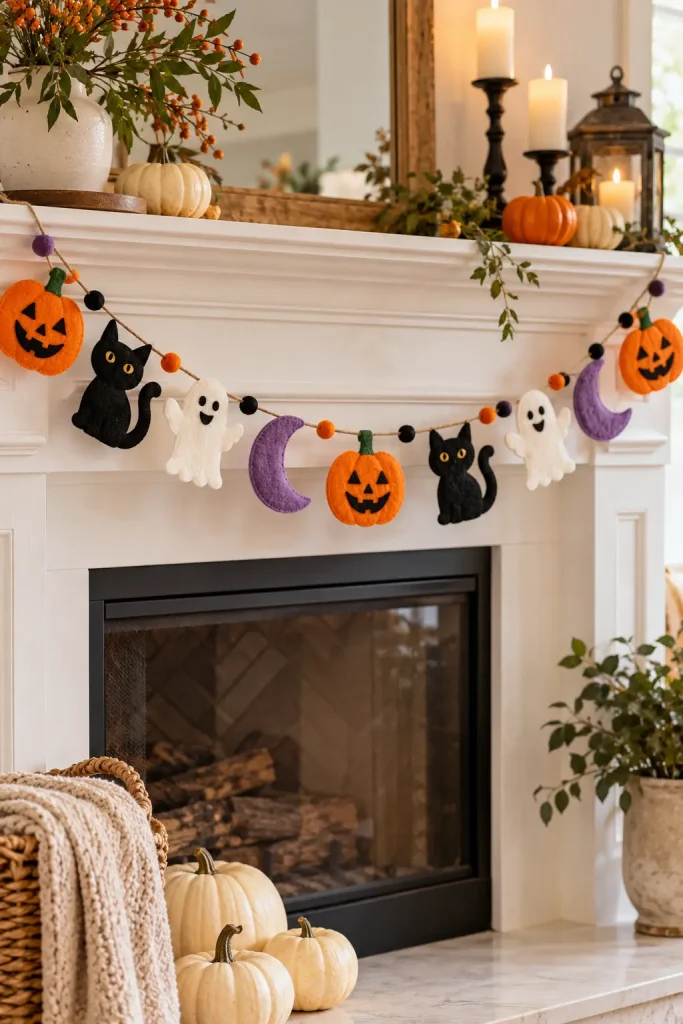
Felt garlands add softness and color to Halloween decorating. Unlike a paper garland, felt can be reused for several seasons when stored carefully.
Cut simple shapes from orange, black, white, and muted purple felt. Pumpkins, cats, ghosts, and crescent moons are easy silhouettes to recognize even from across a room. Attach the shapes to a length of ribbon or string, spacing them evenly but allowing a little variation.
Hang the garland over a mantel, across a bookshelf, or along the front of a party table. If sewing isn’t your preference, choose a suitable fabric adhesive and follow its directions.
Keep the garland away from candles, fireplaces, and other heat sources.
22. Style a Spooky Entryway Table
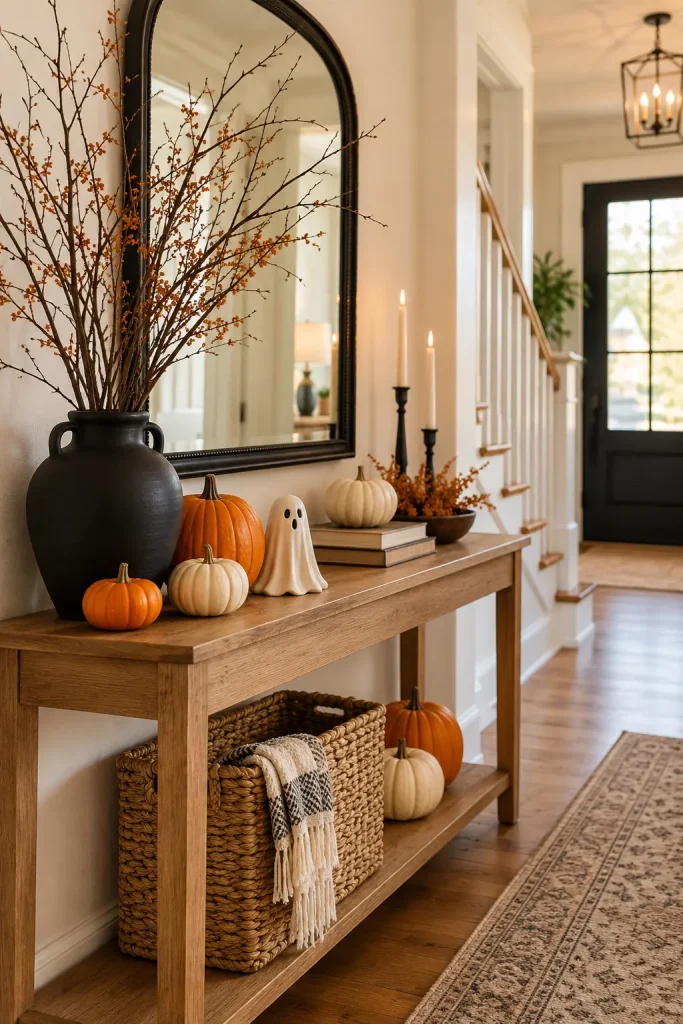
Your entryway is a natural place for Halloween decorations because even a few details can establish the mood of the entire home.
Start with one focal point, such as a dark mirror, a framed seasonal print, or a vase of bare branches. Add a small cluster of pumpkins and one playful accent, like a ceramic ghost or black cat.
If the console is narrow, use a compact arrangement and keep keys, mail, and everyday essentials accessible. A small tray can separate functional items from the decorations.
The goal is to make the entry feel welcoming rather than turn it into a crowded display. A mix of dark accents and natural materials usually provides enough seasonal character.
23. Turn Old Picture Frames Into Halloween Art
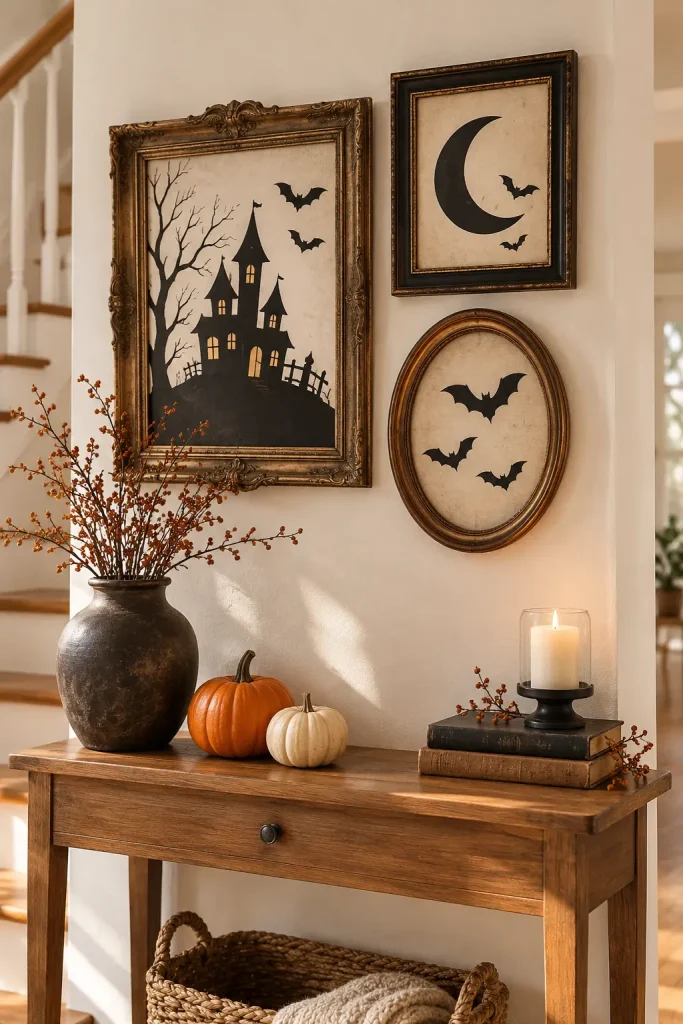
Old picture frames are useful for seasonal decorating because the artwork can be changed without buying new frames every year. Thrifted wood frames, simple black frames, and painted gold frames can all work.
Remove the existing artwork if needed and insert handmade silhouettes, abstract Halloween shapes, or a simple paper moon against a dark background. You can create a matching set or mix several sizes for a small gallery wall.
For a softer interior, use cream paper with black silhouettes. For a dramatic arrangement, choose dark backgrounds and pale moon shapes.
Check that the frames are secure before hanging them, especially above furniture or in busy hallways.
24. Make a Halloween Table Setting With Handmade Place Cards
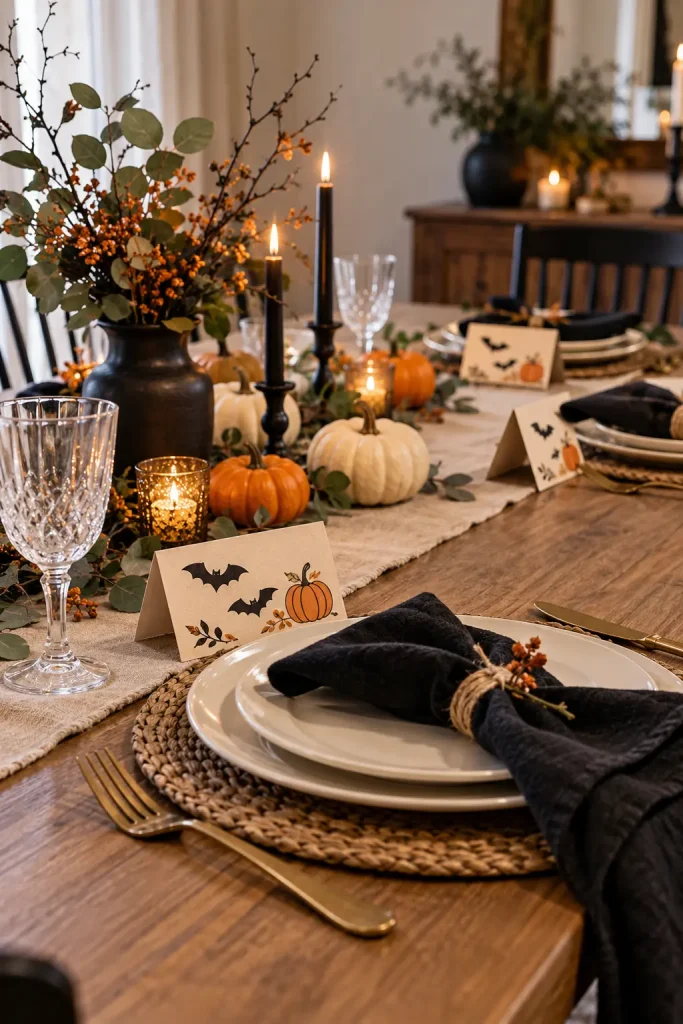
A Halloween dinner doesn’t need elaborate centerpieces to feel special. Handmade place cards give each setting a personal detail while helping guests find their seats.
Fold small pieces of cardstock into tent cards and decorate them with a tiny bat, pumpkin, ghost, or spiderweb motif. If you want to include guests’ names, write them by hand after the cards are dry. Keep the decorative elements small enough that the cards remain easy to read.
Pair the place cards with black napkins, cream plates, clear glassware, and a few miniature pumpkins. Natural wood or a plain linen tablecloth prevents the arrangement from becoming visually busy.
25. Create a Cute Halloween Window Box
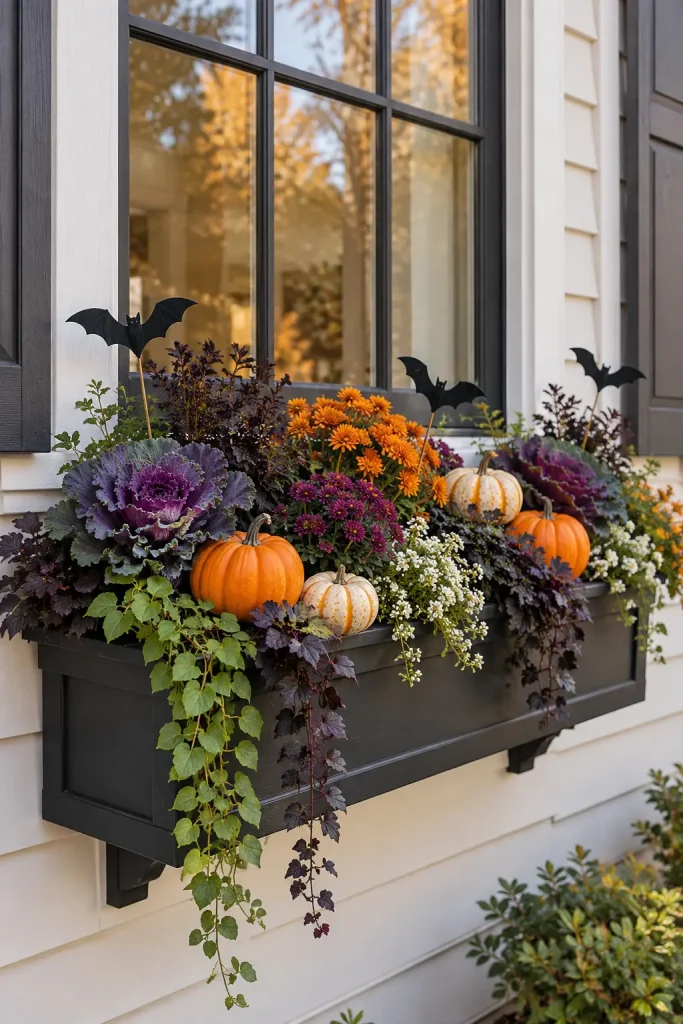
A window box can become part of your Halloween decorating plan without requiring a full porch makeover. Start with the plants or seasonal arrangement already in place, then add a few weather-appropriate accents.
Small pumpkins, decorative branches, and lightweight faux bats can introduce a Halloween theme while leaving the greenery visible. For a cute look, choose cream pumpkins and muted orange accents. For a spookier arrangement, add black silhouettes and darker foliage.
Secure decorations so they won’t blow away, and don’t block drainage or damage living plants. If the window box is exposed to rain or strong wind, use outdoor-suitable materials and avoid delicate paper decorations.
26. Make a Spooky Mirror Display
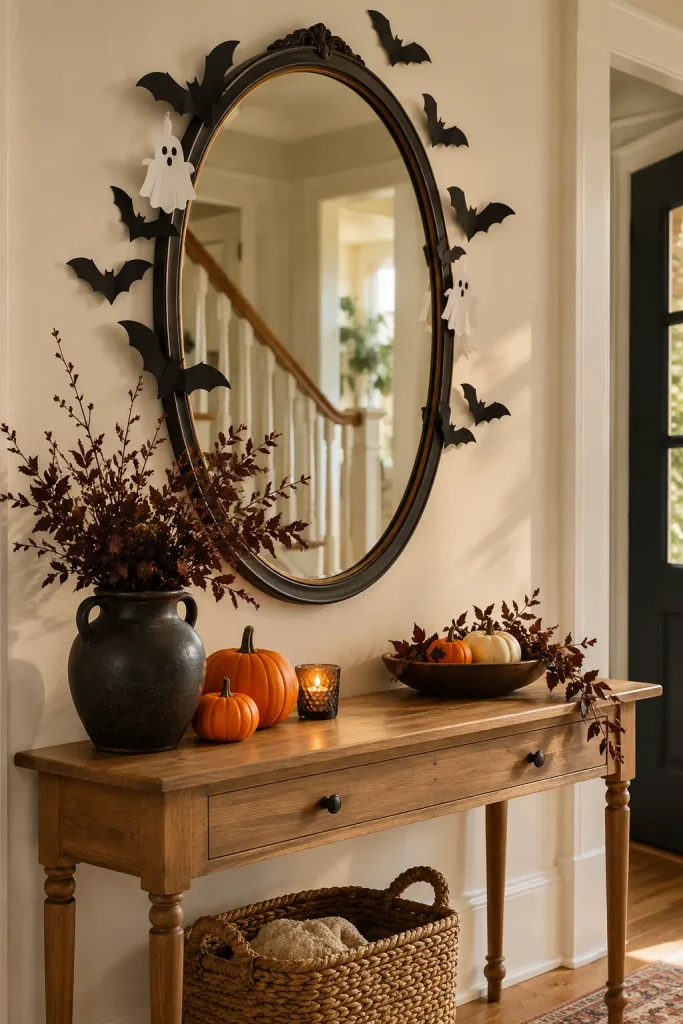
A mirror can become a dramatic Halloween focal point with a few temporary decorations. This works particularly well in an entryway, above a console, or in a hallway.
Use removable paper bats around the outer edge of the mirror, or add a few small ghost shapes near the frame. Leave enough reflective surface visible for the mirror to remain useful.
A vintage-style dark frame creates a moody effect, while a simple oak or white frame suits a lighter Halloween palette. Complete the arrangement with two small pumpkins and a dark vase placed on the console below.
Before attaching anything, confirm that the adhesive is safe for the mirror’s frame and surrounding finish.
27. Build a Mini Halloween Village From Recycled Cardboard
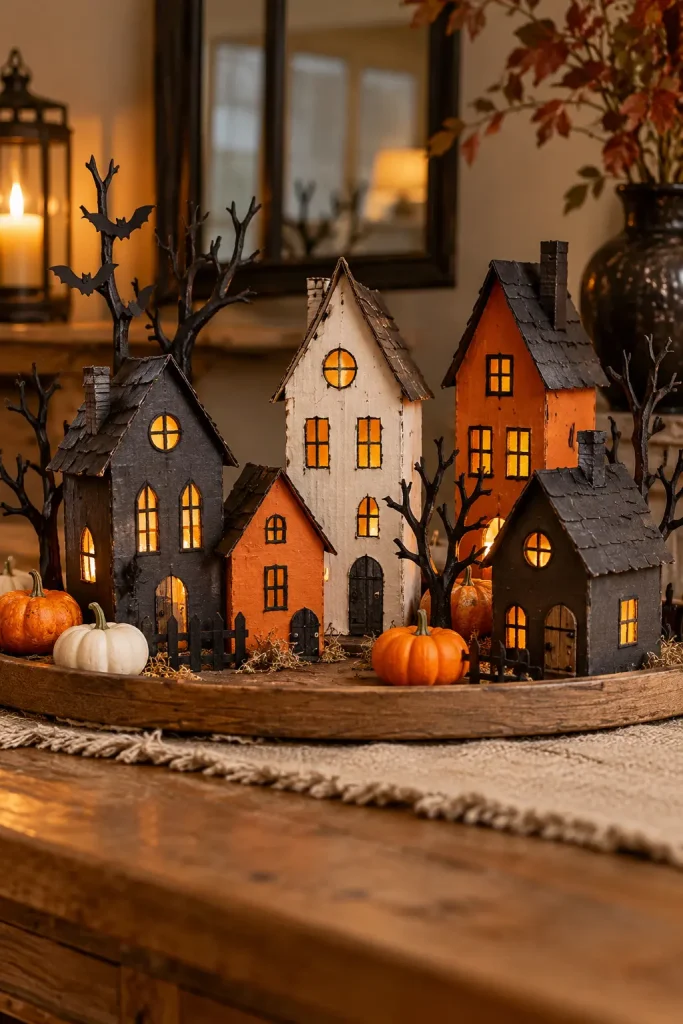
A miniature Halloween village is a creative way to reuse cardboard packaging. Small boxes can become houses, shops, or crooked cottages with only a few cuts and layers of paint.
Flatten and cut the cardboard into simple house shapes, then join the pieces securely. Add paper roofs, tiny window openings, and painted doors. Keep the designs varied: one tall narrow house, one squat cottage, and one slightly crooked building will create a more interesting skyline.
Arrange the village on a shelf or a tray, adding paper trees and miniature pumpkins between the houses. If you want illuminated windows, use small battery-operated lights positioned safely away from combustible materials.
28. Create a Cute Halloween Coffee Station
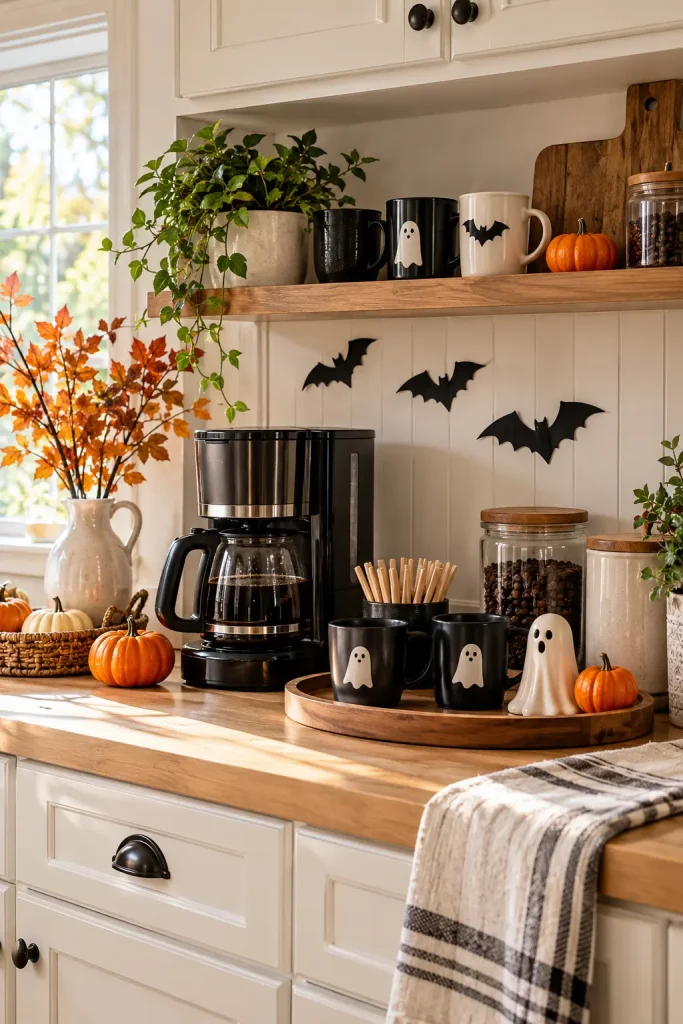
A Halloween coffee station brings seasonal decorating into a space you use every day. Start with your existing coffee maker, mugs, and storage containers, then introduce a few Halloween details that won’t interfere with your routine.
Add one or two black mugs, a small ceramic ghost, a miniature pumpkin, and a simple seasonal tray. A little orange ribbon or a few paper bats on the wall can tie the display together without covering the counter.
Keep frequently used items within easy reach and leave enough room for preparing drinks. If you have open shelving, place the seasonal decorations on one shelf rather than spreading them across the entire kitchen.
The result is festive but still practical for everyday mornings.